前言
最近由于想要做一些事情,所以需要新购入一些 VPS 用于测试,为了方便我给这些 VPS 做个性化设置,于是写出这篇文章方便 CV
本文将从以下几点来依次配置新购入的服务器
- 安全配置
- 必备工具
- 一些测试
- 偏好设置
- 证书转移
观前提示
本文使用的环境为 Ubuntu 24.04 LTS,其他发行版可大致参照思路。
在继续阅读本文之前,建议提前阅读由 LUG@USTC↗ 编写的:https://101.lug.ustc.edu.cn/↗
安全配置
拿到 VPS 首先要做的第一件事就是安全配置了吧。正如电影《我是谁:没有绝对安全的系统》标题中所说并没有绝对安全的系统,但是我们只要做到不让黑客访问我们的 VPS 正如访问他家后门一样轻松就是胜利
创建非 root 账户
有些 VPS 厂商默认提供的是 root 账户。众所周知,root 账户就像 Windows 的 Administrator 一样拥有整个系统最高的权限,这么高的权限自然是不安全的。正确的做法是创建一个非 root 账户,在必须使用 root 权限时使用 sudo 提权。
我们使用以下命令创建一个具有 root 能力的非 root 账户:
useradd -m -G sudo -s /bin/bash <你的用户名> 然后我们给这个用户和 root 用户分别设置一个不同的、至少为 16 位的随机大小写字母 + 数字的密码(个人建议的最低安全性需求):
passwd <你的用户名>然后设置 root 用户的:
passwd root我们这里切换到刚刚注册的账户,之后就以这个为基准了:
su <你的用户名> -禁用 root 用户的 SSH 密码登录
创建完非 root 账户之后,我们就应该不允许 root 用户使用密码登录,root 账户的用户名固定为”root”,如果允许其通过密码登录,攻击者只需进行密码穷举即可尝试攻破系统。
Source: VPS基本安全配置 第97楼↗
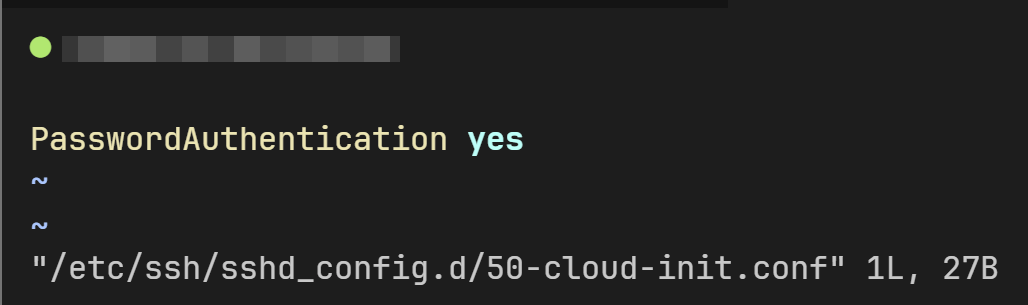
有些云服务商为了启用远程密码登录(sshd 默认禁用 ),会在
/etc/ssh/sshd_config.d/自定义一个 conf 文件,修改 sshd 配置前先要排除它们的干扰。Terminal window 比如 CloudCone 就有一个
/etc/ssh/sshd_config.d/50-cloud-init.conf
执行以下命令创建一个属于我们自己的 SSH 配置文件:
sudo vi /etc/ssh/sshd_config.d/me.conf进行如下设置:
# 禁止 Root 用户通过密码远程登录PermitRootLogin prohibit-password
# 关闭远程密码登录,允许密钥登录PasswordAuthentication noPubkeyAuthentication yesAuthorizedKeysFile .ssh/authorized_keys
# 允许本地密码登录UsePAM yes之后正常为了生效应该重启 SSH 服务:
sudo systemctl restart ssh不过我们这里先不进行,等把该做的做完了之后再来重启 SSH 服务
修改 SSH 端口号
这里我们默认的 SSH 端口号也要修改,默认的是 22,用了一段时间之后就会发现 22 全是猜密码的请求
正常情况下,直接通过 sudo vim /etc/ssh/sshd_config 修改 SSH 端口:
# 设置 SSH端口Port <自拟> # 范围是 1-25565然后再重启 SSH 服务:
sudo systemctl daemon-reloadsudo systemctl restart ssh.service是可行的。
但是在 Ubuntu 22.10 或更高版本 中各位可能发现这是无效的,各位会发现 SSH 服务在重启后依然监听原端口。
因为在Ubuntu 22.10 或更高版本中,SSH 默认通过套接字激活。
在 Ubuntu 22.10、Ubuntu 23.04 和 Ubuntu 23.10 中进行修改的方法是:
Terminal window
listen.conf的参考配置为:Terminal window 如有配置迁移(Ubuntu 22.10及以上,Ubuntu 24.04以下):
Terminal window
SSH 配置修改完成之后,我们可以使用 ssh -T 命令来看一下当前的有效配置
# Root 用户登录方式sudo sshd -T | grep -i "PermitRootLogin"# 密码认证sudo sshd -T | grep -i "PasswordAuthentication"# ssh 端口sudo sshd -T | grep -i "Port"如果在执行 sudo sshd -T | grep -i "PermitRootLogin" 命令的时候看到了 without-password 的输出是正常现象,因为 prohibit-password 是 without-password 的别名
$ sudo sshd -T | grep -i "PermitRootLogin"permitrootlogin without-passwordFail2ban 防暴力破解 SSH
我们刚刚也提到了,默认的 SSH 端口号是 22,用了一段时间之后就会发现 22 全是猜密码的请求。
可是开放的端口号总归是可数的,用程序试还是能给试出来我们的 SSH 端口号是多少,此时我们就需要 Fail2ban 来帮我们防止暴力破解
我们执行以下命令安装 Fail2ban:
sudo apt install fail2ban官方推荐的做法是利用 jail.local 来进行自定义设置:
sudo vi /etc/fail2ban/jail.local可以参照以下配置文件来进行自己的配置(记得删注释):
[sshd]ignoreip = 127.0.0.1/8 # 白名单enabled = truefilter = sshdport = 22 # 端口,改了的话这里也要改maxretry = 5 # 最大尝试次数findtime = 300 # 多少秒以内最大尝试次数规则生效bantime = 600 # 封禁多少秒,-1是永久封禁(不建议永久封禁)action = %(action_)s[port="%(port)s", protocol="%(protocol)s", logpath="%(logpath)s", chain="%(chain)s"] # 不需要发邮件通知就这样设置banaction = iptables-multiport # 禁用方式logpath = /var/log/auth.log # SSH 登陆日志位置使用密钥登录
这里以 Windows 系统为例,在自己的电脑上打开 CMD 或者是 Powershell 后运行:
ssh-keygen -t ed25519直接使用
Generating public/private ed25519 key pair.Enter file in which to save the key (C:\Users\<USER>/.ssh/id_ed25519): # 直接回车Enter passphrase (empty for no passphrase): # 可以留空,也可以设置Enter same passphrase again: # 和上一个一样Your identification has been saved in C:\Users\<USER>/.ssh/id_ed25519Your public key has been saved in C:\Users\<USER>/.ssh/id_ed25519.pubThe key fingerprint is:SHA256:9JPnN/0VqqQFTQ5dIkBC+rdFysFijnzRmxWR1/Yh4kI <USER>@ANITSURIWThe key's randomart image is:然后我们在 VPS 上编辑 SSH 授权密钥文件:
vi ~/.ssh/authorized_keys之后打开 C:\Users\<USER>/.ssh/id_ed25519.pub,复制其内容并粘贴过去就直接生效了。
启用 UFW 防火墙
在正式启用 UFW 之前,我们需要先设置规则。我们首先来设置 UFW 的默认行为:
sudo ufw default allow outgoing # 默认允许所有数据出站sudo ufw default deny incoming # 默认禁止所有数据入站我们可以通过以下命令查看 UFW 当前生效的规则:
sudo ufw statussudo ufw status numbered <数字>我们可以通过以下命令允许或拒绝某端口的传入 / 传出流量(部分以 22、80、443 端口为例):
# 允许22端口的proto协议的流量入站sudo ufw allow in 22/proto
#允许22端口的proto协议的流量出站sudo ufw allow out 22/proto
# 在未指定in/out的情况下,默认为insudo ufw allow 22/proto
# 在未指定proto的情况下,默认为tcp和udpsudo ufw allow 22
# 拒绝的话就把allow改成denysudo ufw deny 22
# 允许从start_port到end_port的端口sudo ufw allow start_port:end_port
# 允许复数个端口,以英文逗号分隔sudo ufw allow port1,port2
# 允许来自于特定ip或cidr段的流量sudo ufw allow from ip/cidr
# 允许来自于特定ip或cidr段端口22的流量sudo ufw allow from ip/cidr to any port 22
# 允许来自于特定ip或cidr段端口22的tcp协议的流量sudo ufw allow from ip/cidr to any proto tcp port 22
# 如果指定复数个端口,则必须指定协议sudo ufw allow from ip to any proto tcp port 80,443
# comment用于注释sudo ufw allow from ip to any proto tcp port 80,443 comment "hello"我们可以通过以下命令删除生效的规则:
sudo ufw delete allow 22 # 在规则前面加个deletesudo ufw delete 1 # 按照numbered的编号删除也行在确定所有规则均成功设置后,通过以下命令启动 / 关闭 / 重启 UFW:
启动防火墙前务必保证 22 端口(或者其他 SSH 端口)被放行。
sudo ufw enable|disable|reload如果需要重置规则,请使用:
重置规则前务必保证 UFW 处于关闭状态。
sudo ufw reset建议仅放行正在使用的端口,比如 22、80、443。
默认情况下,UFW仅记录不符合规则的被拒绝的数据包。如果需要记录与该服务相关的每个详细信息,可以在allow后加上log以进行记录。
# 成功连接 ssh 的也记一下日志备查比较好ufw allow log <SSH端口号>/tcp必备工具
这里就是一些我觉得十分有用的必装的工具
sudo apt install vim curl wget net-tools git screen nginxvim: 上面vi命令的进化版,支持代码高亮等高级功能curl: 一个利用 URL 语法在命令行下传输数据的工具wget: 比curl高级一些的网络内容下载工具,擅长从网络上递归下载文件或整个网站net-tools: 包含ifconfig和netstat等经典网络管理命令的工具包,用于查看和配置网络接口信息git: 管理代码版本的控制工具screen: 能像在 Windows 一样创建永不关闭的窗口(除非手动关闭/意外情况)nginx: 高性能的 Web 服务器
说到必装,在当今时代肯定逃不过 Docker 和 Docker Compose
首先添加 Docker 官方的 apt 仓库
# 添加 Docker 官方 GPG key:sudo apt-get updatesudo apt-get install ca-certificates curlsudo install -m 0755 -d /etc/apt/keyringssudo curl -fsSL https://download.docker.com/linux/ubuntu/gpg -o /etc/apt/keyrings/docker.ascsudo chmod a+r /etc/apt/keyrings/docker.asc
# 添加仓库到 apt 源:echo \ "deb [arch=$(dpkg --print-architecture) signed-by=/etc/apt/keyrings/docker.asc] https://download.docker.com/linux/ubuntu \ $(. /etc/os-release && echo "${UBUNTU_CODENAME:-$VERSION_CODENAME}") stable" | \ sudo tee /etc/apt/sources.list.d/docker.list > /dev/nullsudo apt-get update然后安装 Docker 及其相关软件包
sudo apt-get install docker-ce docker-ce-cli containerd.io docker-buildx-plugin docker-compose-plugin一些测试
这里主要是测试你的 IP 如何,是否能用来做些什么
这里推荐两个工具,一个是来自 xykt↗ 的 IP质量体检脚本↗,另一个是来自 lmc999↗ 的 RegionRestrictionCheck↗
我通常是先运行 IP质量体检脚本↗:
bash <(curl -Ls https://Check.Place) -I来粗略查看 IP 质量
然后再运行 RegionRestrictionCheck↗ 来查看流媒体解锁情况:
bash <(curl -L -s check.unlock.media)还有一个对服务器硬件配置的全面检测
bash <(curl https://raw.githubusercontent.com/vpslog/benchframe/main/benchframe.sh)偏好设置
如果觉得这个 VPS 的 IP 还和自己胃口,就可以进行做一些偏好设置了
修改 hostname
不知道你们对于 hostname 是如何看待的,我对于 hostname 的看法是用于区分我所拥有的机器,通常 hostname 是这台 VPS 作用 / 配置
sudo hostnamectl set-hostname <给VPS起的名字> # eg: JP4C, HK8G, SG1C此处可以配合上面的 使用密钥登录 再加上在
/etc/hosts里面配置 hosts 实现自己拥有的服务器互相连接
调整系统时间
首先设置时区为上海
sudo timedatectl set-timezone Asia/Shanghai然后进行时间同步
# 检查时间同步状态sudo timedatectl status# 启用自动时间同步sudo timedatectl set-ntp true# 重启时间同步sudo systemctl restart systemd-timesyncd如果需要更精确的时间同步,可以安装和使用NTP:
# 安装NTPsudo apt install ntp# 启动并启用NTP服务sudo systemctl enable --now ntp# 查看NTP同步状态ntpq -p开启 BBR + FQ
首先确认内核版本支持 BBR(Linux内核版本 ≥ 4.9)
uname -r创建属于我们自己的配置文件
sudo vim /etc/sysctl.d/myself-bbr.conf添加以下配置内容
net.core.default_qdisc=fqnet.ipv4.tcp_congestion_control=bbr然后让配置生效
sudo sysctl -p /etc/sysctl.d/myself-bbr.conf然后查看刚刚的配置是否生效
# 查看当前使用的拥塞控制算法sysctl net.ipv4.tcp_congestion_control# 查看系统支持的所有拥塞控制算法sysctl net.ipv4.tcp_available_congestion_control# 查看默认的队列调度器sysctl net.core.default_qdisc# 检查BBR模块是否加载lsmod | grep bbr添加 SWAP
Source: 【配置优化】我拿到VPS服务器必做的那些事↗
在 Linux 系统中,SWAP 是指使用磁盘的一些空间,用于在 RAM 不足的时候,作为临时的扩展内存来使用。当系统的物理内存使用量接近饱和,Linux 内核会将一些不常使用的内存页交换到 SWAP 分区中,从而为当前运行的程序腾出更多的物理内存。当这些被交换出去的内存页再次被需要时,它们会被重新换回到物理内存中。SWAP 分区的存在可以在一定程度上避免由于物理内存不足导致系统性能严重下降或进程被强制终止的情况。
因此,SWAP 对于内存小的 VPS 非常有必要,可以提高我们的运行效率。
我们这里可以运行脚本来添加 SWAP:
# 在 root 用户su -wget -O swap.sh https://box.anitsuri.top/swap.sh && chmod +x swap.sh && clear && ./swap.sh然后查看当前内存:
free -h配置 zsh + fzf
zsh 这种东西不用多说,基本都是懂得都懂,shell 个性化必备
首先是来安装 zsh:
sudo apt install zsh可以看一下 zsh 是否安装成功:
which zsh如果这里有显示,那么直接切换到 zsh:
chsh -s $(which zsh)此时,重新连接 SSH 之后就会发现进入了 zsh 的初步引导页面:
This is the Z Shell configuration function for new users,zsh-newuser-install.You are seeing this message because you have no zsh startup files(the files .zshenv, .zprofile, .zshrc, .zlogin in the directory~). This function can help you with a few settings that shouldmake your use of the shell easier.
You can:
(q) Quit and do nothing. The function will be run again next time.
(0) Exit, creating the file ~/.zshrc containing just a comment. That will prevent this function being run again.
(1) Continue to the main menu.
(2) Populate your ~/.zshrc with the configuration recommended by the system administrator and exit (you will need to edit the file by hand, if so desired).
--- Type one of the keys in parentheses ---这里我们选择 1 进入我们的初步引导菜单
Please pick one of the following options:
(1) Configure settings for history, i.e. command lines remembered and saved by the shell. (Recommended.)
(2) Configure the new completion system. (Recommended.)
(3) Configure how keys behave when editing command lines. (Recommended.)
(4) Pick some of the more common shell options. These are simple "on" or "off" switches controlling the shell's features.
(0) Exit, creating a blank ~/.zshrc file.
(a) Abort all settings and start from scratch. Note this will overwrite any settings from zsh-newuser-install already in the startup file. It will not alter any of your other settings, however.
(q) Quit and do nothing else. The function will be run again next time.--- Type one of the keys in parentheses ---然后再选择 0,让工具帮我们创建一个空白的 ~/.zshrc 文件 来都来了
之后安装 Zimfw 这个 zsh 配置框架
curl -fsSL https://raw.githubusercontent.com/zimfw/install/master/install.zsh | zsh此时我们会看到提示
% curl -fsSL https://raw.githubusercontent.com/zimfw/install/master/install.zsh | zsh) Using Zsh version 5.9) ZIM_HOME not set, using the default one.) Zsh is your default shell.! You seem to be already calling compinit in /etc/zsh/zshrc. Please remove it, because Zim Framework's completion module will call compinit for you.) Downloaded the Zim Framework script to /home/<USER>/.zim/zimfw.zsh) Prepended Zim Framework template to /home/<USER>/.zimrc) Prepended Zim Framework template to /home/<USER>/.zshrc) Installed modules.All done. Enjoy your Zsh IMproved! Restart your terminal for changes to take effect.! You seem to be already calling compinit in /etc/zsh/zshrc. Please remove it, because Zim Framework’s completion module will call compinit for you.
提示我们 zsh 配置文件 /etc/zsh/zshrc 中已经有了一行启动 compinit (命令补全) 的代码,我们根据官方脚本的说法,在我们自己的 ~/.zshenv 环境变量里,跳过全局的命令补全
Terminal window
echo 'skip_global_compinit=1' > ~/.zshenv然后就是开始正式配置我们的 zsh 了
首先打开 ~/.zshrc 切换终端输入模式到 Vim 模式:
sudo vim ~/.zshrc# Set editor default keymap to emacs (`-e`) or vi (`-v`)bindkey -v # 把 `-e` 改成 `-v`然后打开 ~/.zimrc 来切换主题以及新增实用插件:
vim ~/.zimrc直接替换到下面的内容即可:
# Start configuration added by Zim Framework install {{{## This is not sourced during shell startup and is only used to configure zimfw.#
## Modules#
# Sets sane Zsh built-in environment options.zmodule environment# Provides handy git aliases and functions.zmodule git# Applies correct bindkeys for input events.zmodule input# Sets a custom terminal title.zmodule termtitle# Utility aliases and functions. Adds colour to ls, grep and less.zmodule utility
# <-- Normally new modules should be added here. Check each module documentation# for any caveats.
## Prompt#
# Exposes how long the last command took to run to prompts.zmodule duration-info# Exposes git repository status information to prompts.zmodule git-info# A heavily reduced, ASCII-only version of the Spaceship and Starship prompts.zmodule bira
## Completion#
# Additional completion definitions for Zsh.zmodule zsh-users/zsh-completions --fpath src# Enables and configures smart and extensive tab completion, must be sourced# after all modules that add completion definitions.zmodule completion
## Modules that must be initialized last#
# 语法高亮插件zmodule zdharma-continuum/fast-syntax-highlighting# Fish-like history search for Zsh, must be sourced after# zsh-users/zsh-syntax-highlighting. Bind keyboard shortcuts in your ~/.zshrc:# https://github.com/zsh-users/zsh-history-substring-search/blob/master/README.md#usagezmodule zsh-users/zsh-history-substring-search# Fish-like autosuggestions for Zsh. Add the following to your ~/.zshrc to boost# performance: ZSH_AUTOSUGGEST_MANUAL_REBIND=1zmodule zsh-users/zsh-autosuggestions# }}} End configuration added by Zim Framework install
# 书签管理插件zmodule pabloariasal/zfm# 在 Tab 补全中使用 fzf 搜索的插件zmodule Aloxaf/fzf-tab然后安装并应用 zim:
zimfw install随后把用不到的给清理下去:
zimfw clean然后来下载 fzf 这个使用的搜索插件的最新版:
git clone --depth 1 https://github.com/junegunn/fzf.git ~/.fzf安装 fzf:
~/.fzf/install$ ~/.fzf/installDownloading bin/fzf ... % Total % Received % Xferd Average Speed Time Time Time Current Dload Upload Total Spent Left Speed 0 0 0 0 0 0 0 0 --:--:-- --:--:-- --:--:-- 0100 1757k 100 1757k 0 0 882k 0 0:00:01 0:00:01 --:--:-- 1343k - Checking fzf executable ... 0.66.1# 是否开启模糊补全Do you want to enable fuzzy auto-completion? ([y]/n) # 这里回车/按 y 即可# 是否开启按键绑定Do you want to enable key bindings? ([y]/n) # 同上
Generate /home/<USER>/.fzf.bash ... OKGenerate /home/<USER>/.fzf.zsh ... OK
# 是否自动更新主配置文件Do you want to update your shell configuration files? ([y]/n) # 同上
Update /home/<USER>/.bashrc: - [ -f ~/.fzf.bash ] && source ~/.fzf.bash + Added
Update /home/<USER>/.zshrc: - [ -f ~/.fzf.zsh ] && source ~/.fzf.zsh + Added
Finished. Restart your shell or reload config file. source ~/.bashrc # bash source ~/.zshrc # zsh
Use uninstall script to remove fzf.
For more information, see: https://github.com/junegunn/fzf然后应用一下即可:
source ~/.zshrc如果此时出现以下警告,是正确的,无需处理
Terminal window
这样 fzf 就已经在系统安装完成了,zsh 也可以用上 fzf
证书转移
然后就是转移各种域名的 SSL 证书了,这里我们要用到 rsync 这个工具
先安装 rsync:
sudo apt install rsync下载下面的脚本:
curl https://box.anitsuri.top/cert_sync.sh -O cert_sync.sh编辑好了之后可以先通过 SSH 测试一下:
ssh -p ${REMOTE_PORT} ${REMOTE_USER}@${REMOTE_HOST}看看是否可以免密连接,如果不可以,那么就参考上面重新配置一下。
测试成功之后可以使用脚本测试一下:
# 这里由于脚本的默认日志地址 `/var/log/cert_sync.log` 需要 root 用户才可以写入,所以需要开 sudosudo bash cert_sync.sh然后看一下日志:
cat /var/log/cert_sync.log之后就转移完成了。
后面如果说一直想要从远程地址定时发送到本地,可以使用 crontab 命令来添加到定时任务中
crontab -e$ crontab -eno crontab for <USER> - using an empty one
Select an editor. To change later, run 'select-editor'. 1. /bin/nano <---- easiest 2. /usr/bin/vim.basic 3. /usr/bin/vim.tiny 4. /bin/ed
Choose 1-4 [1]: # 这里选择 2,使用 vim 来编辑然后以 mm hh day mon dow command 的形式来编写,比如
00 19 1 * * /usr/local/bin/sync_cert.sh >> /var/log/sync_cert.log 2>&1就是在 每月 1 日的 19:00 执行 /usr/local/bin/sync_cert.sh >> /var/log/sync_cert.log 2>&1 的命令,随后保存并退出即可