
容器镜像仓库安装与使用
有时候使用 Docker Hub 这样的公共仓库可能不方便,人们可以创建一个本地仓库供私人使用
一、Registry 安装与使用
(一) Docker Registry 安装
docker-registry 是官方提供的工具,可以用于构建私有的镜像仓库
$ docker run -d -p 5000:5000 --restart=always --name registry registry 此命令会在后台启动一个名为 registry 的容器,并将其暴露在 5000 端口上
默认情况下,仓库会被创建在容器的 /var/lib/registry 目录下。你可以通过 -v 参数来将镜像文件存放在本地的指定路径。例如下面的例子将上传的镜像放到本地的 /opt/data/registry 目录
$ docker run -d \
    -p 5000:5000 \
    -v /opt/data/registry:/var/lib/registry \
    registry
(二) Docker Registry 的使用
创建好私有仓库之后,就可以使用 docker tag 来标记一个镜像,然后推送它到仓库。例如私有仓库地址为 127.0.0.1:5000
先在本机查看已有的镜像
$ docker image ls
REPOSITORY   TAG       IMAGE ID       CREATED         SIZE
nginx        latest    39286ab8a5e1   3 weeks ago     188MB
ubuntu       latest    edbfe74c41f8   5 weeks ago     78.1MB
registry     latest    75ef5b734af4   11 months ago   25.4MB
ubuntu       18.04     f9a80a55f492   15 months ago   63.2MB
centos       latest    5d0da3dc9764   2 years ago     231MB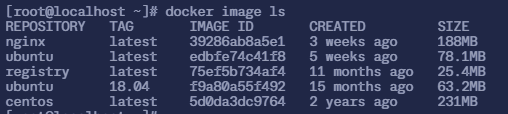
1. 使用 docker tag 标记镜像
将 ubuntu:18.04 这个镜像标记为 127.0.0.1:5000/ubuntu:18.04
格式为 docker tag IMAGE[:TAG] [REGISTRY_HOST[:REGISTRY_PORT]/]REPOSITORY[:TAG]
$ docker tag ubuntu:18.04 127.0.0.1:5000/ubuntu:18.04
$ docker image ls
REPOSITORY              TAG       IMAGE ID       CREATED         SIZE
nginx                   latest    39286ab8a5e1   3 weeks ago     188MB
ubuntu                  latest    edbfe74c41f8   5 weeks ago     78.1MB
registry                latest    75ef5b734af4   11 months ago   25.4MB
ubuntu                  18.04     f9a80a55f492   15 months ago   63.2MB
127.0.0.1:5000/ubuntu   18.04     f9a80a55f492   15 months ago   63.2MB
centos                  latest    5d0da3dc9764   2 years ago     231MB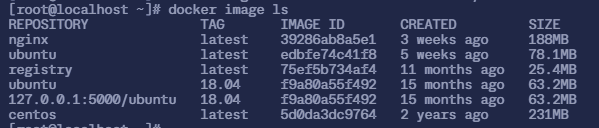
2. 使用 docker push 上传标记的镜像
$ docker push 127.0.0.1:5000/ubuntu:18.04
The push refers to repository [127.0.0.1:5000/ubuntu]
548a79621a42: Pushed
18.04: digest: sha256:0891d22f55fab66664581bbfca80601dfc9d6e8fff8f65a493e9f96644e29417 size: 529 用 curl 查看仓库中的镜像
$ curl 127.0.0.1:5000/v2/_catalog
{"repositories":["ubuntu"]} 这里可以看到 {"repositories":["ubuntu"]},表明镜像已经被成功上传了
先删除已有镜像,再尝试从私有仓库中下载这个镜像
$ docker image rm 127.0.0.1:5000/ubuntu:18.04
Untagged: 127.0.0.1:5000/ubuntu:18.04
Untagged: 127.0.0.1:5000/ubuntu@sha256:0891d22f55fab66664581bbfca80601dfc9d6e8fff8f65a493e9f96644e29417

$ docker pull 127.0.0.1:5000/ubuntu:18.04
18.04: Pulling from ubuntu
Digest: sha256:0891d22f55fab66664581bbfca80601dfc9d6e8fff8f65a493e9f96644e29417
Status: Downloaded newer image for 127.0.0.1:5000/ubuntu:18.04
127.0.0.1:5000/ubuntu:18.04

$ docker image ls
REPOSITORY              TAG       IMAGE ID       CREATED         SIZE
nginx                   latest    39286ab8a5e1   3 weeks ago     188MB
ubuntu                  latest    edbfe74c41f8   5 weeks ago     78.1MB
registry                latest    75ef5b734af4   11 months ago   25.4MB
127.0.0.1:5000/ubuntu   18.04     f9a80a55f492   15 months ago   63.2MB
ubuntu                  18.04     f9a80a55f492   15 months ago   63.2MB
centos                  latest    5d0da3dc9764   2 years ago     231MB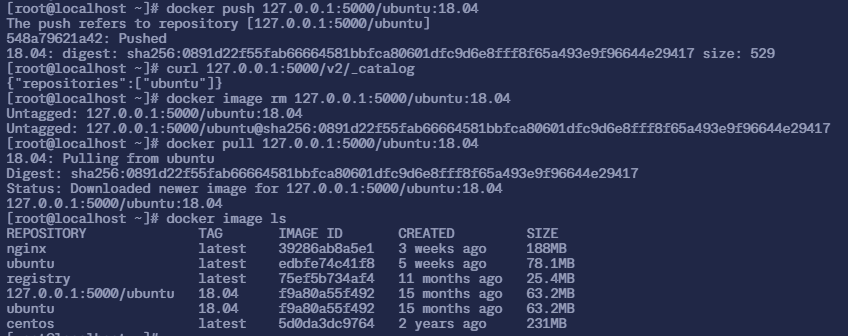
3. 配置非 https 仓库地址
如果你不想使用 127.0.0.1:5000 作为仓库地址,比如想让本网段的其他主机也能把镜像推送到私有仓库。你就得把例如 192.168.92.128:5000 这样的内网地址作为私有仓库地址,这时你会发现无法成功推送镜像
这是因为 Docker 默认不允许非 HTTPS 方式推送镜像。我们可以通过 Docker 的配置选项来取消这个限制,或者查看下一节配置能够通过 HTTPS 访问的私有仓库
需要在 /etc/docker/daemon.json 中写入如下内容(如果文件不存在请新建该文件)
{
  "registry-mirrors": [
    "https://hub.anitsuri.top"
  ],
  "insecure-registries": [
        "192.168.92.128:5000"
  ]
}
注意:该文件必须符合
json规范,否则 Docker 将不能启动。
-
此处的 registry-mirrors 项目是之前配置的 "镜像加速器",如果你的网络够用的话,可以不用配置
{
"insecure-registries": [
      "192.168.92.128:5000"
]
}
注意:该文件必须符合
json规范,否则 Docker 将不能启动。
然后重启服务
$ sudo systemctl daemon-reload
$ sudo systemctl restart docker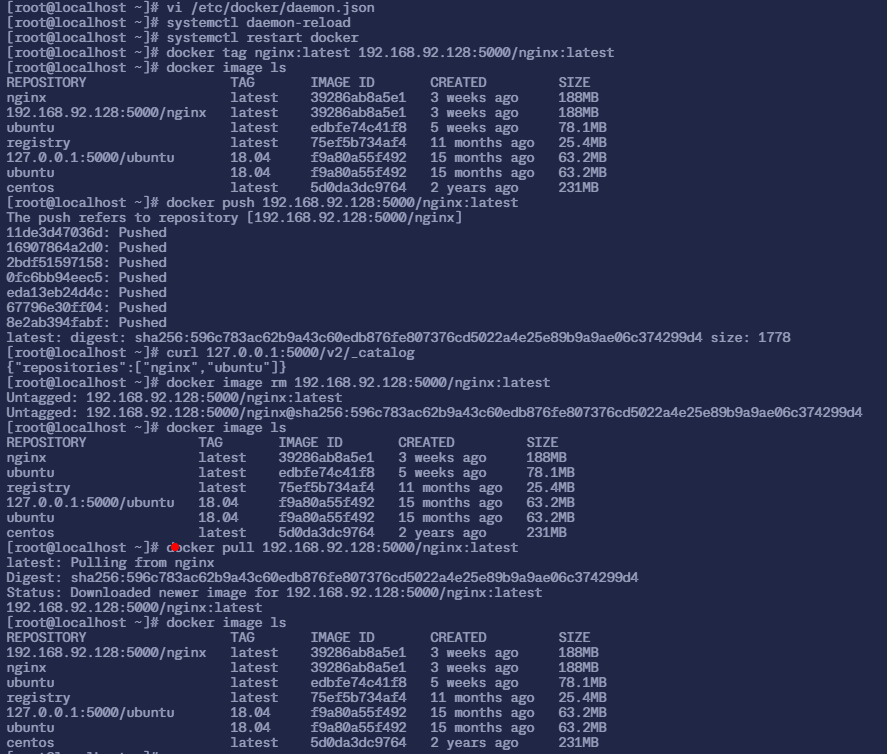
二、Harbor 安装与使用
(一) Harbor 安装
Harbor 依赖 Docker 和 Docker Compose。因此,首先需要在系统中安装 Docker Compose
1. 安装 Docker Compose
从 官方 GitHub Release 处直接下载编译好的二进制文件
$ DOCKER_CONFIG=/usr/local/lib/docker/cli-plugins
$ sudo mkdir -p $DOCKER_CONFIG/cli-plugins
$ sudo curl -SL https://github.com/docker/compose/releases/download/v2.29.1/docker-compose-linux-x86_64 -o $DOCKER_CONFIG/cli-plugins/docker-compose
$ sudo chmod +x $DOCKER_CONFIG/cli-plugins
$ docker compose version

# 国内用户可以使用以下方式加快下载
$ sudo curl -SL https://moka.anitsuri.top/images/Registry+Harbor/docker-compose-linux-x86_64 -o $DOCKER_CONFIG/cli-plugins/docker-compose
2. 安装 Harbor
你可以从 Harbor 的官方 GitHub 上下载最新版本的安装包
Harbor 有 Online(在线版) 和 Offline(离线版) 两种版本
-
Online(在线版):
在线版本在安装时会自动从网络中下载所需的镜像文件和依赖项,因此适合有稳定的互联网连接的环境。
- 优点:
- 体积小:安装包较小,因为不包含 Docker 镜像和所有依赖项。
- 自动更新:安装时会下载最新的镜像和依赖,确保你获得的是最新版本。
- 缺点:
- 需要稳定的网络:如果网络不稳定,可能会导致安装过程中的下载失败或缓慢。
- 需要联网:安装过程中必须保持服务器与外网的连接。
- 优点:
-
Offline(离线版)
离线版本包含了所有需要的 Docker 镜像和依赖,因此不需要依赖互联网来安装,适用于网络受限或没有互联网连接的环境。
- 优点:
- 无需联网:安装过程中不需要访问外网,可以在没有互联网的环境中使用。
- 安装更快:所有依赖和镜像都已经包含在安装包内,不需要额外下载,安装速度较快。
- 缺点:
- 包体积大:离线安装包通常比较大,因为它包含了所有的 Docker 镜像和依赖项。
- 镜像可能不是最新:离线安装包中的 Docker 镜像可能是打包时的版本,安装后可能需要手动更新。
- 优点:
由于 Harbor 服务器在海外,所以我们这里先使用 Offline(离线版) 作为演示
$ sudo curl -O https://github.com/goharbor/harbor/releases/download/v2.11.1/harbor-offline-installer-v2.11.1.tgz

# 国内用户可以使用以下方式加快下载
$ sudo curl -O https://moka.anitsuri.top/images/Registry+Harbor/harbor-offline-installer-v2.11.1.tgz

$ sudo tar -zxf harbor-offline-installer-v2.11.1.tgz
$ cd harbor 修改配置文件,把 harbor.yml.tmpl 复制一个变成 harbor.yml
$ sudo cp harbor.yml.tmpl harbor.yml
$ sudo vi harbor.yml 填写以下内容
# Configuration file of Harbor

# The IP address or hostname to access admin UI and registry service.
# DO NOT use localhost or 127.0.0.1, because Harbor needs to be accessed by external clients.
hostname: 192.168.92.128

# http related config
http:
  # port for http, default is 80. If https enabled, this port will redirect to https port
  port: 80

# https related config
# https:
  # https port for harbor, default is 443
  # port: 443
  # The path of cert and key files for nginx
  # certificate: /your/certificate/path
  # private_key: /your/private/key/path
  # enable strong ssl ciphers (default: false)
  # strong_ssl_ciphers: false

# # Harbor will set ipv4 enabled only by default if this block is not configured
# # Otherwise, please uncomment this block to configure your own ip_family stacks
# ip_family:
#   # ipv6Enabled set to true if ipv6 is enabled in docker network, currently it affected the nginx related component
#   ipv6:
#     enabled: false
#   # ipv4Enabled set to true by default, currently it affected the nginx related component
#   ipv4:
#     enabled: true

# # Uncomment following will enable tls communication between all harbor components
# internal_tls:
#   # set enabled to true means internal tls is enabled
#   enabled: true
#   # put your cert and key files on dir
#   dir: /etc/harbor/tls/internal

# Uncomment external_url if you want to enable external proxy
# And when it enabled the hostname will no longer used
# external_url: http://192.168.92.128:8433

# The initial password of Harbor admin
# It only works in first time to install harbor
# Remember Change the admin password from UI after launching Harbor.
harbor_admin_password: Harbor12345-
解析:
- hostname 配置
如果你在 VMWare 虚拟机中运行 Harbor,并且主要通过本地网络访问,建议将hostname设置为虚拟机的 IP 地址。
- 配置项:
hostname: <虚拟机的IP地址>-
示例:
hostname: 192.168.92.128 -
如果你有自定义域名并能解析到该虚拟机 IP,也可以使用域名。
- HTTP 配置
如果是本地开发或测试环境,可以先使用 HTTP 访问,简化 HTTPS 证书的配置。
- 配置项:
http: port: 80- 使用默认的 HTTP 端口 80。如果需要更改,可以指定其他端口号。
- data_volume(数据存储路径)
Harbor 存储镜像和数据的位置。如果你的虚拟机有额外挂载的磁盘,或者你希望数据存储在特定路径,设置data_volume路径。
- 配置项:
data_volume: /data/harbor- 确保这个目录有足够的磁盘空间来存储容器镜像。
- harbor_admin_password(管理员密码)
初次安装时,可以在此处设置一个易于记忆的管理员密码,用于登录 Harbor Web 界面。
- 配置项:
harbor_admin_password: Harbor12345- 为了安全性,建议在实际部署时使用一个更强的密码。
- hostname 配置

在运行安装脚本前,需要先运行 prepare 脚本,来确保一切依赖和配置都已经就绪
$ sudo ./prepare
prepare base dir is set to /root/harbor
WARNING:root:WARNING: HTTP protocol is insecure. Harbor will deprecate http protocol in the future. Please make sure to upgrade to https
Clearing the configuration file: /config/portal/nginx.conf
...
Generated configuration file: /config/jobservice/config.yml
loaded secret from file: /data/secret/keys/secretkey
Generated configuration file: /compose_location/docker-compose.yml
Clean up the input dir

$ sudo ./install.sh

[Step 0]: checking if docker is installed ...

Note: docker version: 26.1.4

[Step 1]: checking docker-compose is installed ...

Note: Docker Compose version v2.27.1

[Step 2]: loading Harbor images ...
Loaded image: goharbor/prepare:v2.11.1
59cd002b46d2: Loading layer [==================================================>]  21.86MB/21.86MB
...
ecf40289f004: Loading layer [==================================================>]  142.7MB/142.7MB
Loaded image: goharbor/trivy-adapter-photon:v2.11.1

[Step 3]: preparing environment ...

[Step 4]: preparing harbor configs ...
prepare base dir is set to /root/harbor
WARNING:root:WARNING: HTTP protocol is insecure. Harbor will deprecate http protocol in the future. Please make sure to upgrade to https
Clearing the configuration file: /config/portal/nginx.conf
Clearing the configuration file: /config/log/logrotate.conf
...
Generated configuration file: /config/jobservice/config.yml
loaded secret from file: /data/secret/keys/secretkey
Generated configuration file: /compose_location/docker-compose.yml
Clean up the input dir

Note: stopping existing Harbor instance ...
WARN[0000] /root/harbor/docker-compose.yml: `version` is obsolete

[Step 5]: starting Harbor ...
WARN[0000] /root/harbor/docker-compose.yml: `version` is obsolete
[+] Running 10/10
 ✔ Network harbor_harbor        Created                                                                       0.7s
 ✔ Container harbor-log         Started                                                                       1.0s
 ✔ Container harbor-portal      Started                                                                       2.2s
 ✔ Container harbor-db          Started                                                                       1.9s
 ✔ Container registryctl        Started                                                                       2.1s
 ✔ Container registry           Started                                                                       2.4s
 ✔ Container redis              Started                                                                       2.2s
 ✔ Container harbor-core        Started                                                                       2.8s
 ✔ Container nginx              Started                                                                       4.0s
 ✔ Container harbor-jobservice  Started                                                                       3.8s
✔ ----Harbor has been installed and started successfully.----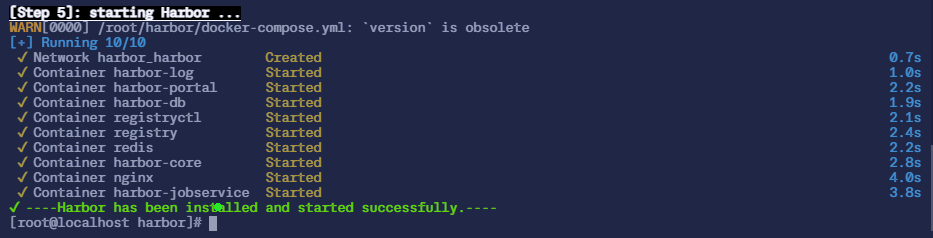
(二) Harbor 的使用
1. 登录
-
docker login [-u 用户名] [-p 密码] [your-harbor-domain.com/IP]$ docker login -u admin -p Harbor12345 http://192.168.92.128登录时,可能会遇到如下情况:
$ docker login -u admin -p Harbor12345 192.168.92.128
WARNING! Using --password via the CLI is insecure. Use --password-stdin.
Error response from daemon: Get "https://192.168.92.128/v2/": dial tcp 192.168.92.128:443: connect: connection refused
这个原因是访问 HTTPS 被拒绝(我们只配置了 HTTP),需要关闭安全验证。修改
/etc/docker/daemon.json并加入如下内容{ "registry-mirrors": [ "https://hub.anitsuri.top" ], "insecure-registries": [ "192.168.92.128" ] }然后重启 Docker
$ sudo systemctl restart docker必要时,可以在安装 Harbor 的机器上重启 Harbor:
$ cd harbor
$ sudo docker compose down -v
$ sudo docker compose up -d
再次登录即可正常使用

-
需要注意,使用 Harbor 时,镜像需要遵循以下格式:
# Docker
$ docker tag SOURCE_IMAGE[:TAG] your.domain.com/PROJECT_NAME/REPOSITORY[:TAG]
$ docker push your.domain.com/PROJECT_NAME/REPOSITORY[:TAG]
$ docker pull your.domain.com/PROJECT_NAME/REPOSITORY[:TAG]

# Helm
$ helm repo add --username admin --password ADMIN_PASSWORD harbor http://your.domain.com/chartrepo/
$ helm plugin install https://github.com/chartmuseum/helm-push
$ helm cm-push CHART_PATH --version="CHART_VERSION" harbor
$ helm repo update
$ helm search repo CHART_PATH
$ helm install RELEASE_NAME CHART_NAME
2. Harbor 用户和项目管理
2.1 启动 Harbor 服务
$ docker compose up -d2.2 停止 Harbor 服务
$ docker compose down -v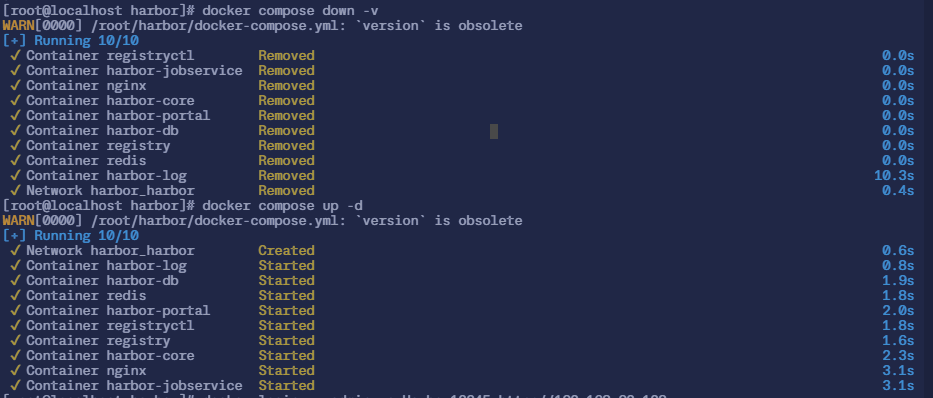
2.3 查看 Harbor 服务状态
$ docker compose ps
2.4 重启 Harbor 服务
$ docker compose restart
2.5 创建项目
$ curl -u admin:Harbor12345 -X POST "http://<harbor_url>/api/v2.0/projects" -H "Content-Type: application/json" -d '{
  "project_name": "<my-project>",
  "public": true
}'-
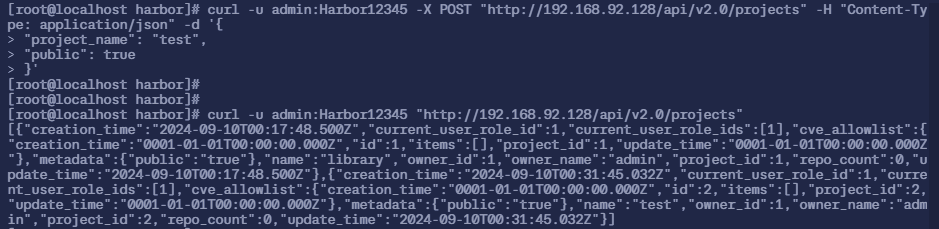
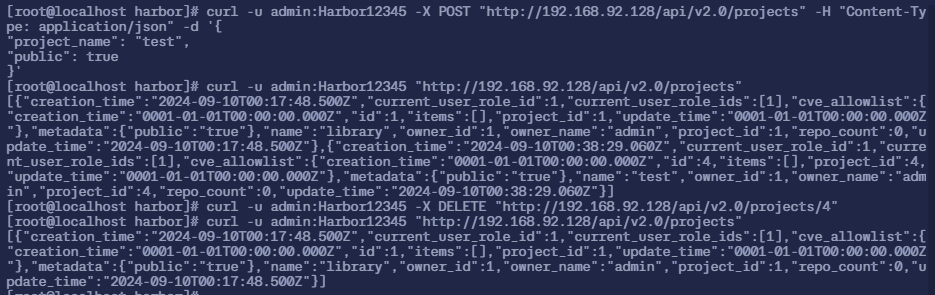
比如
$ curl -u admin:Harbor12345 -X POST "http://192.168.92.128/api/v2.0/projects" -H "Content-Type: application/json" -d '{
"project_name": "test",
"public": true
}'
2.6 列出所有项目
$ curl -u admin:Harbor12345 "http://<harbor_url>/api/v2.0/projects"-
比如:
$ curl -u admin:Harbor12345 "http://192.168.92.128/api/v2.0/projects"
2.7 删除项目
$ curl -u admin:Harbor12345 -X DELETE "http://<harbor_url>/api/v2.0/projects/<project_id>"-
比如:
$ curl -u admin:Harbor12345 -X DELETE "http://192.168.92.128/api/v2.0/projects/4"
3. Harbor 镜像管理
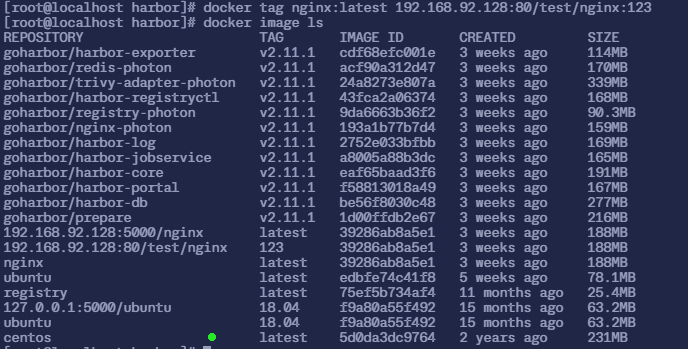
3.1 为镜像打标签
$ docker tag SOURCE_IMAGE[:TAG] your.domain.com/PROJECT_NAME/REPOSITORY[:TAG]-
比如
$ docker tag nginx:latest 192.168.92.128/test/nginx:123
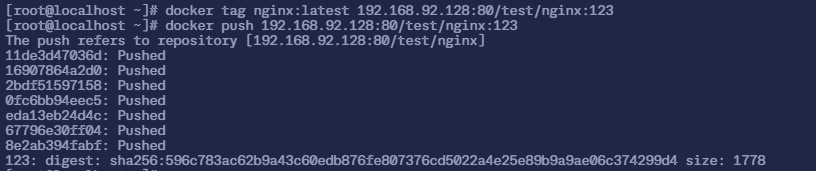
3.2 推送镜像
$ docker push your.domain.com/PROJECT_NAME/REPOSITORY[:TAG]-
比如
$ docker push 192.168.92.128/test/nginx:123
3.3 从 Harbor 拉取镜像
$ docker pull your.domain.com/PROJECT_NAME/REPOSITORY[:TAG]- 比如
$ docker pull 192.168.92.128/test/nginx:123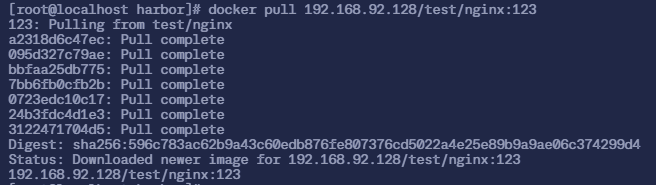
3.4 获取项目的仓库列表
$ curl -u admin:Harbor12345 "http://<harbor_url>/api/v2.0/projects/<project_name>/repositories"-
比如
$ curl -u admin:Harbor12345 "http://192.168.92.128/api/v2.0/projects/test/repositories"
3.5 查看镜像仓库中的所有镜像
$ curl -u admin:Harbor12345 "http://<harbor_url>/api/v2.0/projects/<project_name>/repositories/<repository>/artifacts"-
比如:
$ curl -u admin:Harbor12345 "http://192.168.92.128/api/v2.0/projects/test/repositories/nginx/artifacts"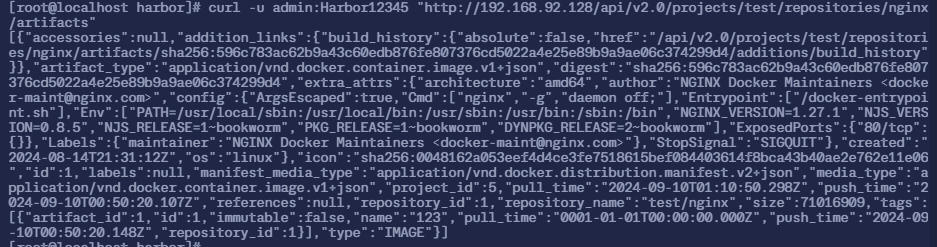
3.6 删除镜像
$ curl -u admin:Harbor12345 -X DELETE "http://<harbor_url>/api/v2.0/projects/<project_name>/repositories/<repository>/artifacts/<tag>"-
比如:
$ curl -u admin:Harbor12345 -X DELETE "http://192.168.92.128/api/v2.0/projects/test/repositories/nginx/artifacts/123"
4. Harbor 日志与监控
4.1 查看 Harbor 容器日志
$ docker compose logs <service_name>-
比如:
$ docker compose logs registryctl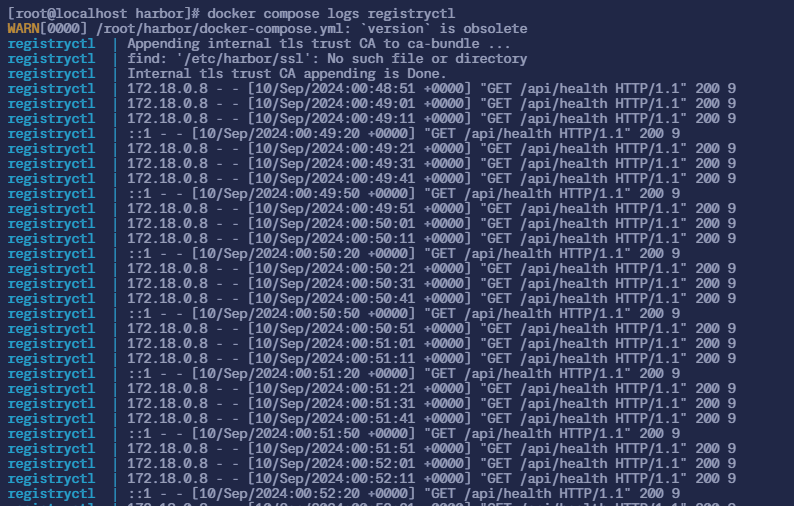
4.2 查看所有服务日志
$ docker compose logs5. Harbor 系统维护
5.1 备份数据库
$ docker exec -it harbor-db pg_dumpall -c -U postgres > harbor_backup.sql- 将
harbor-db容器中的 PostgreSQL 数据库全部导出,并保存为harbor_backup.sql文件docker exec -it harbor-db: 在运行的容器harbor-db中执行一个命令,-it让这个命令在交互模式下运行pg_dumpall -c -U postgres: 使用 PostgreSQL 的pg_dumpall工具来导出所有数据库。-c选项告诉pg_dumpall在导出数据前添加删除语句,以确保导入时可以清空已有的数据。-U postgres指定使用postgres用户
5.2 恢复数据库
$ docker exec -i harbor-db psql -U postgres < harbor_backup.sql- 将
harbor_backup.sql文件中的数据导入到harbor-db容器的 PostgreSQL 数据库中。它使用psql工具来执行导入操作docker exec -i harbor-db: 在名为harbor-db的容器中执行命令,-i表示将输入文件流传递给容器中的命令psql -U postgres: 使用psql工具连接到 PostgreSQL 数据库,-U postgres指定使用postgres用户< harbor_backup.sql: 将本地的harbor_backup.sql文件作为输入,传递给psql命令执行
5.3 备份 Harbor 配置文件和数据卷
$ tar -zcvf harbor_backup.tar.gz [配置文件的位置] [数据卷的位置]5.4 恢复 Harbor 配置文件和数据卷
$ tar -zxvf harbor_backup.tar.gz -C /harbor_backup.tar.gz文件,里面包含了之前备份的/data和/etc/harbor目录,现在想将其解压回原位置,即恢复到根目录/,执行完这个命令后,备份文件中的/data和/etc/harbor文件夹及其内容将恢复到根目录下的相应位置
5.5 启用内容签名(Content Trust)
$ export DOCKER_CONTENT_TRUST=16. Harbor 镜像复制与同步
6.1 手动触发镜像复制
$ curl -u admin:Harbor12345 -X POST "http://<harbor_url>/api/v2.0/replication/executions" -H "Content-Type: application/json" -d '{
  "policy_id": <replication_policy_id>
}'
6.2 查看复制任务状态
$ curl -u admin:Harbor12345 "http://<harbor_url>/api/v2.0/replication/executions"如果想要有完整的观看体验,请点击这里
Comments NOTHING